Flavoring During First Fermentation
Lets talk about the unique art of advanced flavoring of kombucha. Home brewing kombucha can be a rewarding past-time when you have the time and patience for it, as this fermented beverage is versatile when it comes to adding unique and creative flavors to each batch. Add “booch booster” and other flavoring agents to a second fermentation (F2) of kombucha is a wonderful experience; it can add bubbles as well as make the brew taste sweet or savory and everything in between.
What does it mean to add advanced flavoring to kombucha? It means going beyond the safety of flavoring during a second fermentation and taking measured risks. Is brewing kombucha safe? I sure hope it is, as long as the brew is monitored and checked periodically for signs of scoby growth rather than mold development, smell of vinegar, taste between sweet and acidic after five days, kept at the appropriate temperature, and fermented for the appropriate length of time. That was just a general summary, the point is that there are factors to consider.
What we mean here is that, unlike moving your finished first ferment batch (F1) of kombucha to bottles and adding flavors to create a second fermentation (F2), we’re instead adding flavors directly into our first ferment. This concept felt alien and taboo to me for a long time, since I’ve only ever flavored during (F2) and was warned not to flavor during (F1) since it could destroy the scoby. Let’s go into more detail.
To Flavor a Primary Fermentation
For a recap of how to brew a first fermentation of kombucha, check out our post about it here. When we perform advanced flavoring of kombucha, we make our (F1) similar to how we’ve been brewing it, however there are some important differences. First big difference is that we’ll be setting aside 3-4 cups of starter liquid per gallon brew vessel instead of the typical 1-2 cups; this is to aide in preventing mold growth due to the additional sugars, yeast, and oils we’ll be introducing with this advanced brewing technique. Before adding the scoby to the brew vessel, we’ll be adding our flavoring agents directly into it.
For a recap of flavoring kombucha and how to perform a second fermentation (F2), check out our post here. Like flavoring agents used for an (F2), we can use fruit in different forms from cut up chunks and concentrated fruit juices with no added ingredients, as well as a variety of herbs, spices, tisanes, decoctions, and syrups. More on the latter three in a bit.
Now there are some important things to consider when performing advanced flavoring of kombucha. First thing is that a little goes a long way when it comes to flavoring; since we’ll be letting the flavoring agents sit for the 5-7 days it takes for the (F1) to finish instead of the typical 3-4 days during an (F2). Another is whether you’ll want to remove the scoby and starter liquid after your satisfied with (F1) and letting the brew initiate an (F2) directly in the brew vessel before bottling; additional flavors can be added for the next 1-4 days before straining and bottling, however, (F2) is typically done in an anerobic environment (bottled and capped) to produce carbonation.
Another thing to consider is the ‘10 Generation Rule‘, which, basically states that to really determine whether a specific brew recipe is safe for the scoby (aka the flavors you decide to use for (F1)), to repeat that exact recipe for 10 brew cycles. Why? When we think of a healthy scoby, we think of it as looking milky white or vibrant color and expanding naturally in size during fermentation. It can be difficult to determine with just a few brew cycles, but if the scoby hardly forms or struggles to develop, or it turns dark brown over time, its a sign our advanced flavoring of kombucha hasn’t worked out, and a more suitable recipe should be followed up.
There are necessary nutrients every scoby and kombucha brew needs to obtain within those 10 cycles, including caffeine, certain vitamins and minerals, and a source of energy (sugar for example). Difference varieties of plain tea along with a clean and natural source of sugar are the perfect solution for keeping the fermentation healthy and thriving for many cycles.
Experimental Ingredients such as Herbs and Fruit to Try
A simple warning before using certain flavoring agents. Some ingredients should be used sparingly, as they may contain oils and chemicals that can affect (F1) negatively. Ingredients like ground coffee, peppermint, and sage are prime examples. Let’s take a look at three kinds of flavoring agents, tisanes, decoctions, and syrups, including fruit, and then take a look at some ingredients that may be fun to try experimenting with.
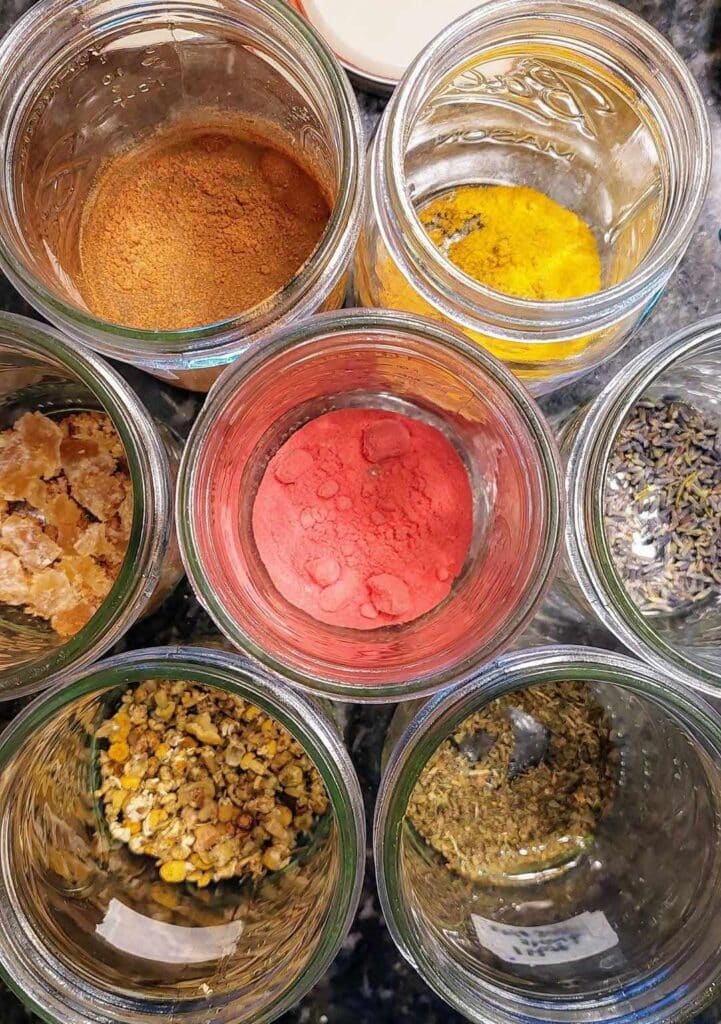
Our first kind of flavoring agent are tisanes, which are essentially herbal teas, or teas made from the flowers and leaves of plants that are then steeped in hot liquid to extract their flavor. Unlike green, black, oolong, white, and Pu-erh teas which are all made from the ‘camellia sinensis’ plant, tisanes don’t always contain caffeine. Brewers use tisanes to have control over the intensity of the flavor of the brew. Longer steeping would, obviously, increase the intensity of flavor. Examples of tisanes include hibiscus, chamomile, rooibos, elderflower, and peppermint.
The next kind of flavoring agent are decoctions, which are basically the bark and fibrous parts you find on certain plants. Unlike tisanes, time and temperature play a bigger role with extracting flavor from decoctions. Examples include burdock root, dandelion root, licorice root, ginger root, oat bark, cinnamon bark, and root bark.
Syrups are a third kind of flavoring agent. Boiling one part water with one part sugar can produce a simple syrup that can be combined with tisanes or decoctions. One easy way of doing this is making an infusion using tisanes or decoctions, then proceeding to add sugar and continuing boiling the liquid until it reduces to a syrup. A little goes a long, such as one ounce per gallon brew. You may be able to come up with your own examples such as a strawberry, a lavender, a mint, or even a root beer simple syrup.
Setting aside herbs and spices, lets talk about fruit. It is possible to swap out sugar and use fruit as a source of fuel for the scoby. We recommend using fruit juice, a simple concentrate with no added flavors or preservatives or acids. Fruit chunks are difficult for the brew to break down and use as an energy source. But if you do to use fruit chunks, use two cups of fruit for one cup of sugar. In any case, simply using fruit chunks or juice can be used to add fruity flavors to your brew, just be mindful that it can overpower the flavor of any tea or herb used, so its recommend to brew the tea 50% longer.
Some more examples we came up with for flavoring agents include chamomile, lavender, bay leaves, rosemary, rose petals, thyme, basil, sage, along with many kinds of chopped fruits and berries, plants and herbs. Can you think of other herbs or spices that may work well in a first fermentation of kombucha? How about adding two cinnamon sticks to add warmth to the brew, or perhaps one tablespoon chopped ginger to add a lovely zing to it? To get to the point, the possibilities for flavor combinations is endless.
Our Own Experience Advanced Flavoring
I (Ryan) have brewed hundreds of gallons of kombucha in my own home over the years. I’ve experimented with countess fruits, herbs, and spices, both failing and succeeding to come up with perfect kombucha flavors using second fermentation. It was a long time before I even realized flavors could be incorporated into the first fermentation. I’ve always read that doing so could do irreversible damage to the scoby and brew as a whole. Certainly I wouldn’t add flavoring to an (F1) for Bucha Bros if I’m trying to replicate the same exceptional taste and flavor over and over. With advanced flavoring of kombucha, you absolutely risk the quality diminishing after repeating a few batch cycles of those same flavor recipes.
Even if you do succeed, every scoby needs specific things to keep on producing properly (think of caffeine, nutrients, and an energy source like sugar). And that might be why its considered “advanced” flavoring, because its risky and not just any kombucha home-brewer wants to do that. But I can tell you one advanced technique we tried and had a bit of fun with.
Kombuffee, or perhaps koffucha, happens when you swap the tea for none other than coffee grounds, literally coffee kombucha. I’ve made my own hot brewed kombuffee using light roast ground coffee steeped for half the time as black tea; it came out rather mild but the sweet tanginess complimented the coffee aftertaste. Its something I would tweak and experiment with again, possibly even making it a future farmers’ market flavor.
I’ve also made a cold brewed kombuffee using the legendary ‘The Noma Guide to Fermentation‘ recipe, and my goodness it was the thickest and richest cup of coffee I’ve ever had in my life, with the added acidity that you get from kombucha. Its something black-coffee enthusiasts would rave about, but not something the masses would be ready for. And with both types of advanced brewing, the scoby was noticeably small accounting for the duration of the fermentation time. It was only a couple cycles, but perhaps if I continued for 8 more, I’d have a better idea if the scoby can hold up to kombuffee for that long.
A quick note about carbonation, coming from me, my personal advanced tip, if you will. Kombucha is naturally effervescent, and doesn’t naturally have a crazy amount of bubbles even with adding booch boosters like sugar or candied ginger to aid in the development of CO2. Bottling your brew for a second ferment and leaving at room temperature for a 3-7 days sealed, especially in a swing-top bottle with a long neck, will create massive fizz, but may even explode if opened without chilling first. Just a warning however, as CO2 develops at room temperature, so does ethanol (aka, alcohol). Remember to filter and refrigerate your brew when finished!
I would like to experiment with more advanced brewing recipes of my own, and I’m curious -if you yourself are a kombucha home-brewer, have you ever tried flavoring your brew during a first fermentation? Let us know in the comments! Thank you for taking the time to read this; we hope you’ve learned something new about kombucha. Cheers!
Sources:
Crum, H., & LaGory, A. (2016). The big book of kombucha: Brewing, flavoring, and enjoying the health benefits of fermented tea. Storey Publishing
Redzepi, René, and David Zilber. The Noma Guide to Fermentation. Artisan, 2018.