First Fermentation
So you’re interested in trying your hand at home-brewing fermented tea? Well done! You’re on your way to brewing some master-class artisan kombucha! Let’s not get ahead of ourselves though, as there are many important aspects to consider before diving head first. If this is your first time hearing about kombucha and would like to know more about it, check out our post about it here.
There are two main fermentation cycles when brewing kombucha, and some brewers continue on with a third cycle as well. This post will focus on the first fermentation cycle of brewing; to make it easier I will abbreviate “first fermentation” as “F1”.
For F1, we need to gather our ingredients, those being
- a scoby
- tea
- sugar
- measuring cup
- pot
- 1-gallon brew vessel
Let’s begin.
Choosing a Scoby
First thing you need to do is get your scoby. These jelly-like pale disc’s sell for $10 online, unless you can get one from a friend or family member, then that’s even better! There are four main types of scoby you can get.
There are Homegrown scobys, which are made without using store-bought kombucha.
Store-bought scobys are another, grown from kombucha from a grocery-store bottle and are often pasteurized and contain additives.
The third and fourth are Tibetan and California Girl, these will be discussed in a separate post. To make things simple, we suggest using a homegrown scoby bought from a trusted source. This type is versatile and well-balanced.
It’s also important to remember to treat your scoby with love and care, at least we at Bucha Bros, LLC think so! It is a living creature, as off-putting as that may seem to beginners, so it needs food in the form of sugar and a home in the form of a kombucha vessel. We will get to this in a moment.
I must include this; don’t pet your scoby with your bare hands! Use clean tongs with rubber claws or gloved hands when handling your scoby, as you do not want to introduce bad germs to it.
Choosing the Best Tea
After you’ve chosen your scoby (which should come with sufficient starter liquid starter), the next step is choosing which type of tea to use. Really, seemingly any kind of liquid can hold a scoby as long as it’s plain and sweetened with sugar. However, tea provides an excellent amount of nutrients and caffeine to keep the scoby alive and thriving, so it’s always preferred. I have not tried brewing kombucha using milk or coffee or other liquids that aren’t brewed tea, nor do I recommend ever trying them.
When choosing a tea, it’s important to consider what flavor you are aiming for in the end. Are you looking to brew just a F1 which has no additional fruit or herb flavoring? We won’t get to second fermentation (F2) in this post, however it is something to consider.
We mainly work with organic black tea at Bucha Bros. Organic because it doesn’t include pesticides, which may affect the health of the scoby.
Green tea is also a great option and has a milder taste than black.
Oolong tea works great as well and it’s flavor (and level of tea leaf oxidization) sits between green and black tea.
Really, any kind of tea that is not herbal, already flavored, or has essence added to it, works best. Earl grey wouldn’t work because it includes the essence of bergamot. The tea used in F1 kombucha brewing should also be caffeinated, because that too provides needed energy and nutrients for the scoby. Kombucha does contain a little caffeine, but like with the sugar, most of it is consumed by the scoby.
Choosing the Right Sweetener
The last thing to consider is the type of sweetener you will use to feed your scoby. We personally recommend a sweetener that is organic and not too complicated or harsh for your scoby. What we mean by that is… it needs to be able to dissolve in liquid and not contain any complex ingredients that may bring harm to the scoby.
At Bucha Bros, we use organic cane sugar in our F1, and that’s it. Some brewers use honey, date sugar, coconut sugar, or simple syrups made from those sugars. Some even use fruit juice such as kiwi juice, however, not only is that more expensive but it can be too complex for the scoby to handle and therefore overwhelm it. Still, some brewers use a variety of juices for F1, therefore we can’t completely discourage it. Sweeteners like molasses, brown sugar, and especially artificial sweeteners like aspartame or maltodextrin are never advised, as the scoby can’t handle them.
If you are afraid of packing calories, fear not! The scoby will feed on practically 90% of that sugar, so what you’re left with is really less than 10 to 20% of the sugar you put into it originally. Unfortunately, brewers really can’t skimp on the step, because the scoby really does need the sugar (and the correct amount) to survive and there can’t be alternatives, unfortunately.
Making the First Fermentation
Now that we have our ingredients, we can actually start the first fermentation for our ‘buch. To make things simple, we are going to only focus on making a one-gallon jar of kombucha so it will be important that you have access to a glass kombucha vessel to hold your scoby and tea; you can find them easily online, here is an example of one! Not everyone agrees on the amounts to use, so I will give a ballpark estimate of how much of each ingredient to use!
First, I would add 4 to 6 cups of filtered water in your gallon kombucha vessel (using a 4-cup measuring cup helps with this) . I would then boil four to six cups of water on a stovetop, using any 4-cup+ pot you have on hand. Wait for the water to boil, then shut the heat off but keep the pot over the burner. Then you are going to use four to eleven tea bags or two to four tablespoons of loose leaf tea, and any combination like black and green or oolong works fine. Why such a broad range?
I’ll be honest, when I first started brewing, I used a kombucha brewing kit that called for four tea bags, and that worked decently for me for a while, however many people use six to eleven for a bolder and deeper flavor. So you can experiment with that! Next, after 10 to 15 minutes of steeping the tea have passed, remove the tea from the water and add about one cup of sugar. Make sure to stir the pot so that all the sugar dissolves and there are no crystals remaining.
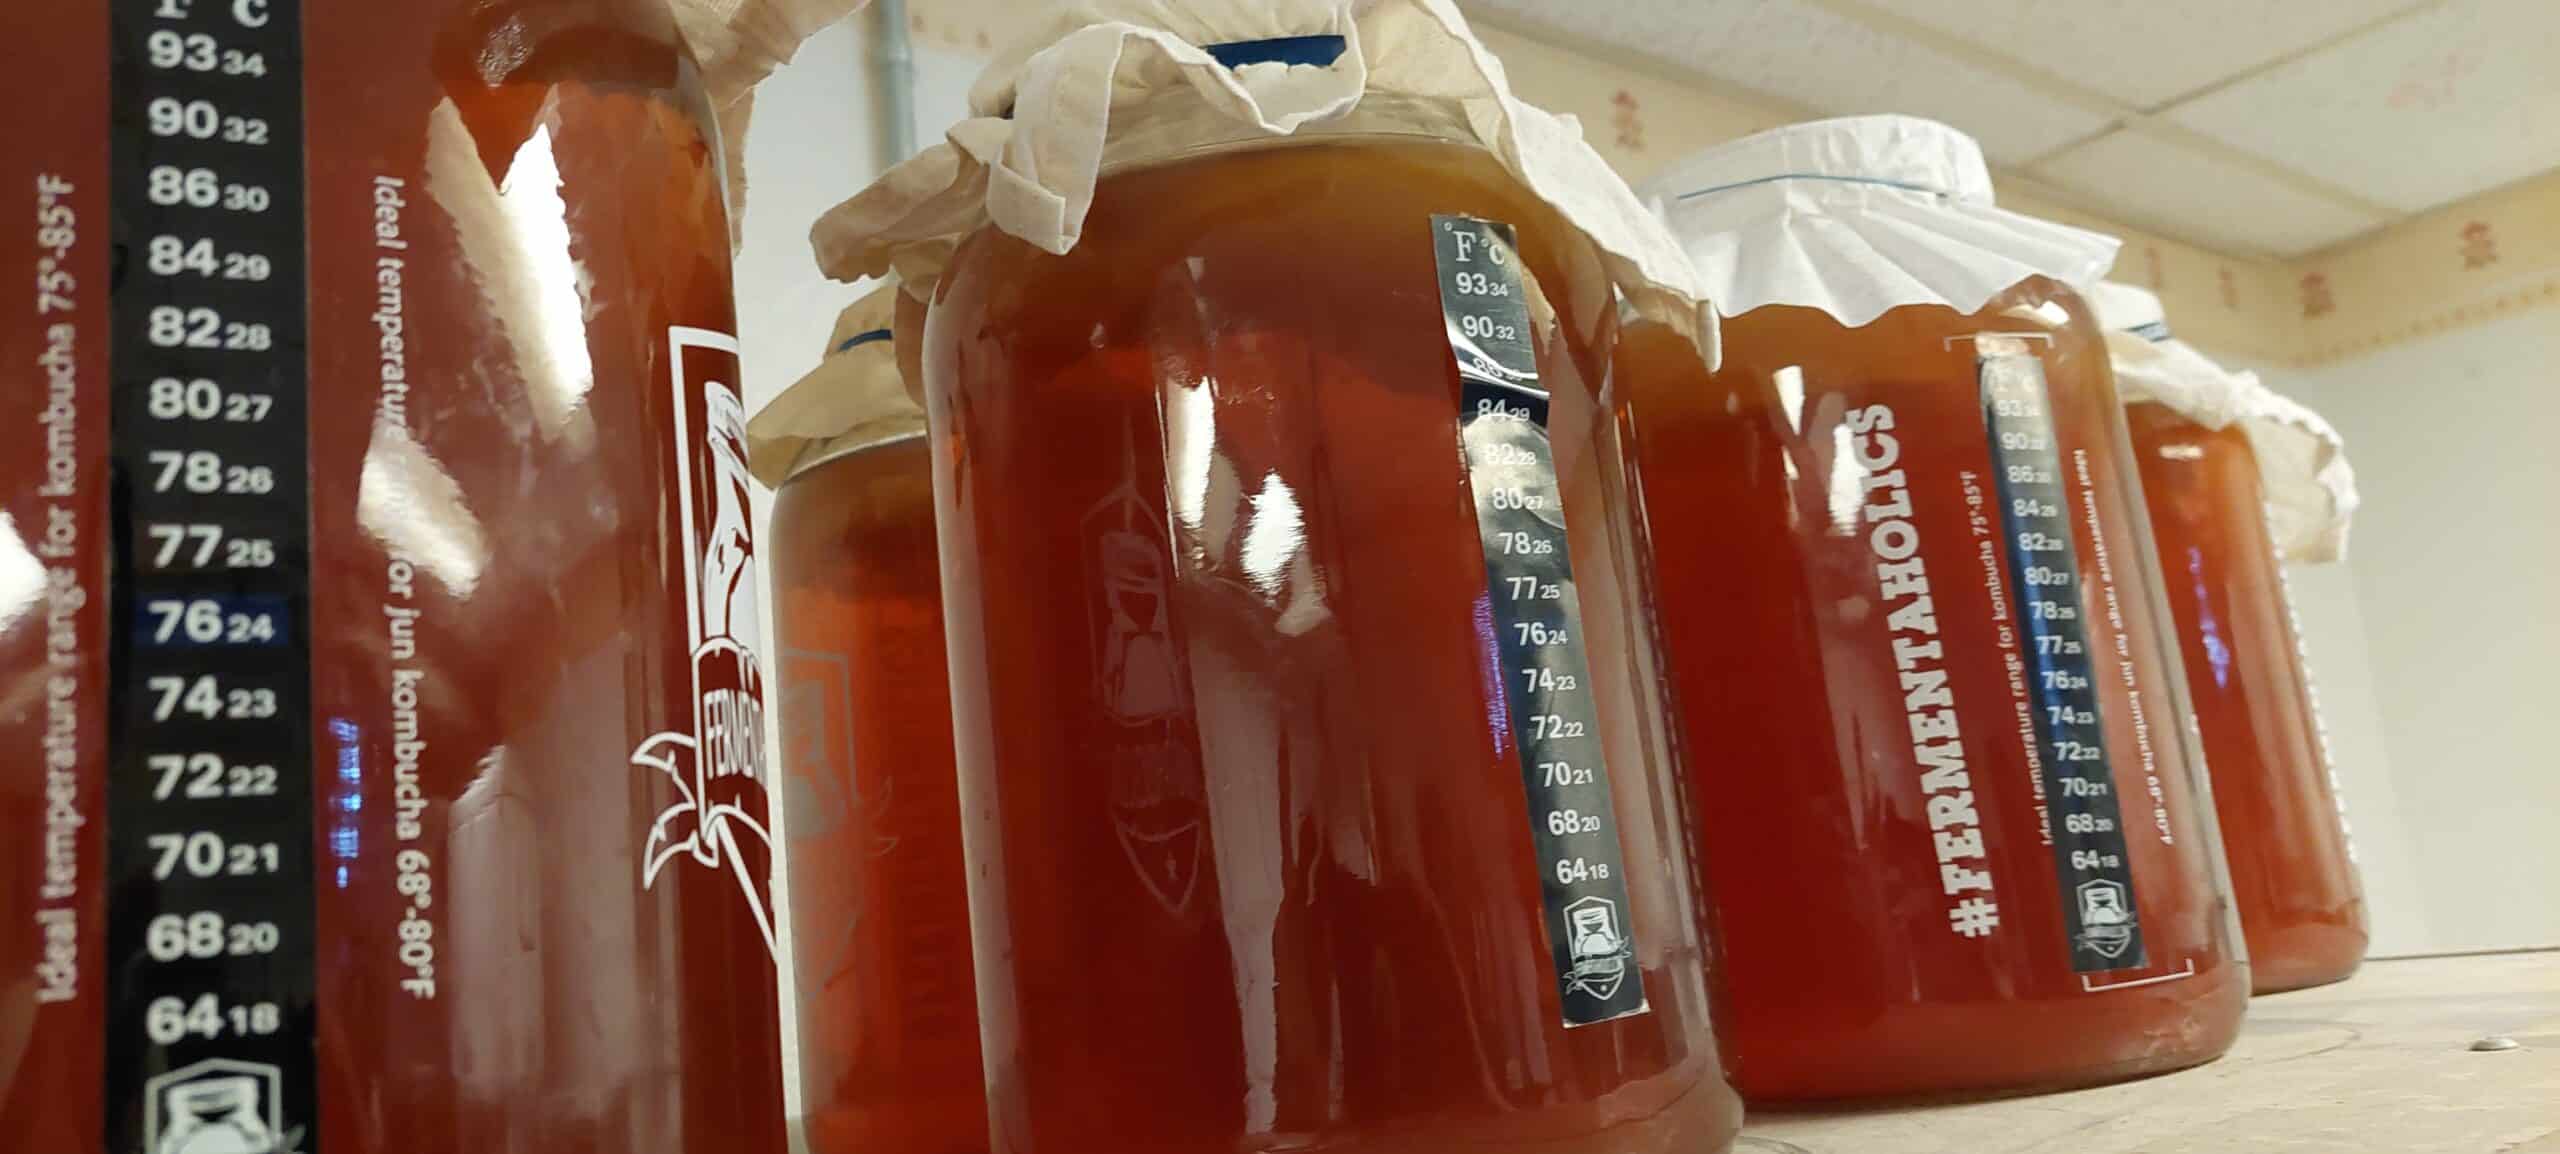
Next you will pour the pot of tea into the kombucha vessel, be very careful doing so as to not splash yourself with the hot tea. Now it is important to have a sticky label thermometer on the vessel so that you can read the temperature of the jar, these usually come with the purchase of these one-gallon jars. The brew jar will probably be above 85° f, so it is important to wait for the temp to drop below that point, say, 80°, before dropping your scoby and its starter liquid in. I have personally made the mistake of adding the scoby too quickly and the heat actually killing it, rookie mistake! And now you are almost done.
Finishing Up F1
Grab a coffee filter or cheesecloth and cover your kombucha vessel using a rubber band to hold it in place. Why can’t you leave the jar open, you may ask? You don’t want any bad bacteria or mold coming into contact with your first fermentation liquid, as the pH is not yet low enough to fend off any bad bacteria in the air. You also cannot block the air from reaching the vessel because the scoby needs to breathe!
Depending on where you store your vessel of kombucha, hopefully in an area away from direct sunlight and in a room that is above 75° and less than 85°. That last part can be tough, especially in the winter, so we recommend either a seeded plant heat mat or an actual kombucha heat wrap to ensure that your kombucha ferments properly. Too cold, below 70°, and your scoby will go dormant and fail to ferment. Too hot, above 90°, and your scoby will die unfortunately. Now is the waiting game.
We recommend checking the temperature and pH of your vessel every few days to ensure correct conditions. By that, we mean taking samples out using a clean spoon or dropper for testing. It is also important to carry pH strips or a pH reader to check after this time frame. The kombucha needs to be below 4.2 pH and above 2.5 pH for healthy human consumption. Too high, and the cultures of bacteria within the brew can’t protect the good bacteria from external fungi or bacteria. Too low, and the brew will be too acidic for humans to drink. If you are not satisfied with the smell, taste, and pH after 7 days, you can keep checking each day up to 10 days. Shorter fermentation periods result in sweeter tasting kombucha, while longer brew times will produce more sourness. We recommend no more than 15 days (for a 1-gallon brew jar fermenting at 75 degrees Fahrenheit, larger vessels and colder temperatures take longer to ferment).
What do I look for when checking if the scoby is healthy? If a pellicle forms above the scoby, a flat film that covers the top of the jar liquid, that is a surefire healthy ‘buch! It is also no problem if the scoby sinks to the bottom of the vessel, usually that is a sign of no air bubbles below to push it up.
Getting a Bad ‘Buch
Now if the scoby has green or odd fuzzy gray spots on it, or the pellicle is covered in the same, then that is a sign that it has gone moldy and the entire batch, liquid and all, needs to be thrown out and restarted. It is unfortunate, but it does happen!
A bad ‘buch can sometimes happen from temperature abuse, from using tools that were not sanitized. Even remnants of antibacterial soap from a previous clean can be harmful to the scoby if the utensil was not rinsed properly. I’ll admit, one time I was using a metal pot to hold the scoby between fermentations, and that ended up killing the scoby as chemicals from the metal leached into the starter liquid.
Sometimes its using too much water and having too small of a scoby or not enough starter liquid, that it’s not developed enough to handle all that water. Either way, we hope this does not happen to you, ever. But it does happen and it’s completely normal to make mistakes.
Takeaway
When you judge that the first fermentation is finished, you may take the scoby out along with two cups of fermented tea from the batch to make a new first fermentation , or make a scoby Hotel which we will not get into this post. You can now pour the rest of the ‘buch into glass bottles or containers and store in the fridge, which will slow the fermentation down significantly.
From here you are ready to drink your kombucha. If you have read all of that, I congratulate you! This probably could have been far fewer words, but I find that every detail is important and should not be skipped. You may get excited and miss out on a few minor details that can be the reason your batch goes bad. If you’re interested in moving on to the next step, second fermentation, check out our post describing it in detail here. (link we be added week of 1/18).
Send us images of your own process and results of your hard work and how the brew turned out! We would love to hear from you. Thanks again for reading!